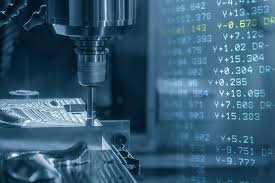
CNC programming is essential for modern manufacturing, guiding machines to create precise components. This guide simplifies the basics, from machine parts to writing your first program, helping newcomers transition into CNC programming. Mastering these skills boosts productivity, accuracy, and career opportunities in industries like automotive and industrial equipment manufacturing.
Understanding Your CNC Machine Components
Before diving into programming, you need to understand the key components that execute your code. Each part plays a crucial role in translating your program into physical operations.
Control Panel and Interface
The control panel serves as your primary interface with the CNC machine. Modern controllers feature touchscreen displays that show program code, machine status, and diagnostic information. Most systems include jog controls for manual machine movement, feed rate overrides for adjusting cutting speeds, and emergency stop buttons for immediate shutdown.
Familiarize yourself with your specific controller’s layout. Popular brands like Fanuc, Haas, and Siemens each have unique interfaces, but they share common functions for program loading, editing, and execution.
Spindle and Tool Systems
The spindle holds and rotates cutting tools at precise speeds measured in revolutions per minute (RPM). Programming requires you to specify spindle speeds that match your material and cutting tool requirements. Too slow, and you’ll get poor surface finish; too fast, and you risk tool breakage.
Tool turrets or automatic tool changers allow machines to switch between different cutting tools during operation. Your program must specify which tool to use for each operation, along with appropriate speeds and feeds for that specific tool.
Coordinate Systems and Work Offsets
CNC machines operate using coordinate systems that define precise positions in three-dimensional space. The X, Y, and Z axes correspond to horizontal, vertical, and depth movements respectively. Work offsets tell the machine where your workpiece is located relative to the machine’s home position.
Understanding coordinate systems is essential because every movement in your program references these coordinates. Whether you’re working with a flender gearbox or other machinery, incorrect work offsets can result in scrapped parts or damaged tools.
Mastering G-Code Fundamentals
G-code is the universal language of CNC programming. These alphanumeric commands control every aspect of machine operation, from tool movements to spindle control.
Essential G-Code Commands
G00 initiates rapid positioning moves, moving the tool quickly between positions without cutting. Use this command to position tools above workpieces or move between cutting operations.
G01 creates linear interpolation moves at specified feed rates. This command performs actual cutting operations, moving the tool through material at controlled speeds.
G02 and G03 generate circular interpolation moves. G02 creates clockwise arcs while G03 creates counterclockwise arcs. These commands require additional parameters to define the arc’s center point and radius.
G90 and G91 switch between absolute and incremental positioning modes. Absolute positioning references all coordinates from a fixed origin point, while incremental positioning references each move from the current tool position.
M-Code Functions
M-codes control machine functions beyond tool movement. M03 starts spindle rotation clockwise, while M04 starts counterclockwise rotation. M05 stops spindle rotation.
M06 initiates tool changes in machines equipped with automatic tool changers. M08 and M09 turn coolant flow on and off respectively. M30 signals program end and typically returns the machine to its starting position.
Coordinate and Feed Commands
F-codes specify feed rates in inches or millimeters per minute. Higher feed rates increase productivity but may compromise surface finish or tool life. Material hardness, tool geometry, and machine rigidity all influence optimal feed rates.
S-codes set spindle speeds in RPM. Like feed rates, spindle speeds must match your specific cutting conditions. Most programming references provide recommended speeds and feeds for various material and tool combinations.
Creating Your First CNC Program
Writing a basic CNC program follows a logical sequence that ensures safe, efficient operation. Start with program setup, then define cutting operations, and finish with safe program termination.
Program Structure and Setup
Begin every program with a program number, typically formatted as O1001 or similar. Add spindle speed and tool commands early in the program. For example:
O1001
T01 M06 (Select tool 1)
G90 G54 G00 X0 Y0 (Absolute positioning, work offset, rapid to start position)
S1000 M03 (Start spindle at 1000 RPM clockwise)
Defining Cutting Operations
Plan your cutting sequence to minimize tool changes and reduce cycle time. Position the tool above the workpiece using G00 rapid moves, then use G01 to make cutting passes through the material.
Include appropriate feed rates for each operation. Face milling operations typically use higher feed rates than contouring operations. Always consider your tool’s capabilities and the material being machined.
Safety Considerations
Include safety moves throughout your program. Retract tools to safe positions before tool changes or program completion. Use absolute positioning modes to maintain precise control over tool locations.
Add comments throughout your program using parentheses to document your intentions. Clear documentation helps troubleshoot problems and makes programs easier to modify later.
Best Practices for Efficient CNC Programming
Developing good programming habits early prevents costly mistakes and improves machining efficiency. These practices apply regardless of your specific machine or control system.
Tool Selection and Management
Choose tools appropriate for your specific operations. Roughing operations benefit from larger, more aggressive cutting tools, while finishing operations require precise, sharp tools designed for surface quality.
Organize tools logically in your tool library. Group similar tools together and maintain consistent tool numbering across programs. This organization reduces setup time and minimizes programming errors.
Optimizing Cutting Parameters
Start with conservative cutting parameters and increase them gradually as you gain experience. Monitor tool wear, surface finish, and cycle times to find optimal settings for your specific applications.
Document successful parameter combinations for future reference. Building a database of proven speeds, feeds, and tool combinations accelerates future programming projects.
Programming Safety Features
Include safety blocks throughout your programs. Position tools well above workpieces during rapid moves. Verify that tool lengths and work offsets are correct before running programs on valuable workpieces.
Use single-block mode when testing new programs. This feature executes one program line at a time, allowing you to verify each operation before proceeding.
Conclusion
CNC programming blends technical knowledge with practical experience to solve manufacturing challenges. Start small, use simulations, and practice to grow your skills. Formal training and staying updated on new technologies can help you advance into areas like multi-axis machining and automation.