A lush, green lawn is often seen as a symbol of a well-maintained home. It enhances curb appeal, provides a soft area for children and pets to play, and contributes to a cooler, more comfortable outdoor environment. Yet achieving that picture-perfect lawn isn’t always easy—especially if you’re starting from bare soil, patchy grass, or areas damaged by erosion or overuse.
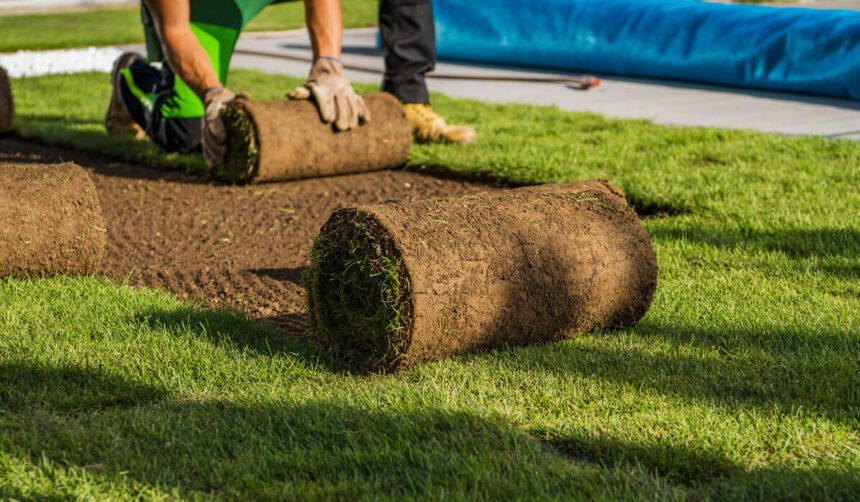
One of the most effective solutions for an instant transformation is sod installation. Unlike seeding, which takes time and requires optimal conditions for germination, sod offers immediate results. It’s pre-grown grass that is harvested in strips with roots and a thin layer of soil, then laid down like a natural carpet. When properly installed and cared for, sod provides a fast, durable, and attractive lawn that can thrive in a wide range of environments.
In this article, we’ll dive deep into everything you need to know about sod installation—from preparation to maintenance—to help you create a lawn that’s both beautiful and built to last.
What Is Sod and Why Choose It?
Sod is essentially mature grass that has already been cultivated and grown on specialized farms. It’s sold in rolls or slabs and can include a variety of grass species suited to different climates, soil types, and sun exposures. Because sod comes with an established root system, it establishes more quickly than seed and offers instant gratification.
Advantages of Sod Installation:
- Immediate Results: You get a green lawn on day one, with full coverage.
- Erosion Control: Perfect for slopes or areas prone to water runoff.
- Weed Suppression: Since it’s dense and pre-grown, sod prevents most weeds from taking hold.
- Quicker Usability: Unlike seeded lawns that take weeks to grow in, sod lawns are usable within a couple of weeks.
- Season Flexibility: While spring and early fall are ideal, sod can be installed during more of the year than seed can.
When Is the Best Time for Sod Installation?
The best time for sod installation depends on the type of grass you’re laying and your local climate. However, there are general guidelines that can improve your success rate:
- Cool-Season Grasses: Best installed in early spring or early fall.
- Warm-Season Grasses: Ideal in late spring through early summer.
Avoid installing sod during extreme heat, drought conditions, or when the ground is frozen. Proper temperature and moisture are crucial for root establishment.
Preparing the Ground for Sod
One of the most overlooked aspects of sod installation is site preparation. Laying sod on poorly prepared soil can lead to poor root development, uneven surfaces, and long-term issues. Follow these steps to ensure success:
1. Clear the Area
Remove all existing grass, weeds, rocks, and debris. This can be done using a sod cutter, hoe, or tiller. The cleaner the area, the better the sod will bond with the soil.
2. Grade the Soil
Ensure proper drainage by sloping the soil away from buildings or structures. Use a rake or grading tool to eliminate low spots where water might collect.
3. Test and Amend the Soil
Conduct a soil test to determine pH and nutrient levels. Most grasses prefer a pH between 6.0 and 7.5. Amend the soil with compost, lime, or fertilizers as needed based on the test results.
4. Till and Level
Till the soil to a depth of 4 to 6 inches to loosen it and promote root penetration. Remove clumps and rocks, and then level the soil with a rake.
5. Water the Soil Lightly
Lightly moisten the soil before laying sod. It should be damp but not muddy, providing a hospitable environment for root growth.
How to Properly Install Sod
Once your soil is prepped, it’s time for sod installation. Timing is critical—sod should be installed the same day it’s delivered to prevent drying out.
Step-by-Step Installation Process:
- Start Along a Straight Edge
Begin laying sod along a sidewalk, driveway, or other straight edge. Avoid stretching the sod; lay it flat against the ground. - Stagger the Joints
Just like bricks, stagger the sod strips in a brickwork pattern. This prevents erosion and promotes a seamless lawn. - Tighten the Seams
Lay pieces as close together as possible without overlapping. Gaps can lead to weed growth or dry spots. - Use a Roller
Once installed, use a lawn roller to press the sod into the soil. This removes air pockets and improves root contact. - Water Immediately
Within 30 minutes of installation, thoroughly water the new sod to help it settle and begin the rooting process.
The First Few Weeks: Aftercare and Maintenance
The initial weeks after sod installation are critical to its success. During this establishment period, your lawn is vulnerable and requires consistent care.
Watering Schedule:
- Week 1–2: Water daily (or twice daily in hot weather), keeping the sod and soil consistently moist.
- Week 3–4: Transition to every other day as roots begin to establish.
- After 4 Weeks: Water less frequently but more deeply to encourage deep root growth.
Avoid walking on the sod for the first 2–3 weeks to allow roots to anchor firmly into the soil.
Mowing:
Wait until the grass reaches 3–4 inches in height before the first mowing. Make sure your mower blade is sharp and never remove more than one-third of the grass blade length at a time.
Fertilization:
Apply a starter fertilizer after installation if not already done. At around 4–6 weeks, apply a balanced fertilizer to support ongoing growth.
Weed Control:
Avoid herbicides for at least 4–6 weeks. If weeds appear, hand-pull them or wait until the sod is fully established to apply weed control.
Common Sod Installation Mistakes to Avoid
Even a great product can fail if not installed properly. Here are common errors to watch out for:
- Laying Sod on Poorly Prepared Soil: Skipping soil preparation can lead to poor root growth and lawn failure.
- Allowing Gaps or Overlaps: These can lead to uneven watering, bare patches, or fungus.
- Not Watering Immediately: Fresh sod dries out quickly. Delayed watering can cause permanent damage.
- Walking on New Sod: Pressure can disrupt rooting and compact the soil.
- Skipping the Roller: Air pockets prevent roots from bonding with the soil below.
Avoiding these pitfalls greatly increases the odds of long-term lawn success.
Long-Term Lawn Maintenance Tips
After the first month, your new lawn should be well-rooted and ready for long-term care. Here’s how to keep it thriving:
- Water Wisely: Water deeply but infrequently. Early mornings are ideal to reduce evaporation.
- Mow Regularly: Keep grass at optimal height depending on species (generally 2.5–3.5 inches).
- Fertilize Seasonally: Use appropriate fertilizers for spring, summer, and fall.
- Aerate Annually: Aeration reduces soil compaction and promotes deeper root growth.
- Control Weeds and Pests: Use integrated pest management and appropriate treatments as needed.
A healthy sod lawn, once established, is surprisingly low-maintenance—especially compared to patchy seeded lawns that require constant attention.
Is Sod Installation Right for You?
While more expensive upfront than seeding, sod offers unmatched advantages in terms of speed, consistency, and durability. It’s ideal for:
- Homeowners looking for immediate results
- Areas where erosion control is needed
- Lawns with high foot traffic
- Landscapes with uneven or poor soil quality
If you value a clean, finished look without the waiting time of seed growth, sod installation is likely the best choice for your landscape.
Final Thoughts
A lush lawn doesn’t have to be a long-term project. With sod installation, you can transform a barren or patchy yard into a beautiful, green space almost overnight. While it requires some upfront investment and careful maintenance during the early stages, the results are well worth it.
From site preparation to watering, every step in the process plays a vital role in the long-term success of your sod. Whether you’re tackling the job yourself or hiring professionals, understanding the ins and outs of sod installation empowers you to make smart, informed decisions—and enjoy the rewards for years to come.
If you’re ready to invest in your outdoor space and want fast, dependable results, sod installation may be the perfect solution. It’s a shortcut to beauty, functionality, and long-term satisfaction in your landscape.
For More Information, Visit Dotmagazine