Indoor cameras are an essential tool for ensuring the security and safety of your home. They offer peace of mind by allowing you to monitor activities inside your house at any given time. In this guide, we’ll walk you through the process of installing an indoor camera quickly and maintaining it to ensure reliable, long-term functionality. Whether you’re installing a camera for the first time or looking to optimize your current setup, we’ll provide practical tips and methods to make the process seamless and effective. Let’s dive into the essential steps to set up your indoor camera efficiently.
Preparing for Installation
Setting up an indoor camera requires planning to ensure optimal performance.
Choosing the Right Spot for Your Camera
Selecting the perfect location is crucial for maximizing your camera’s effectiveness. Begin by assessing the areas you wish to monitor—common spaces like living rooms, entryways, and nurseries are popular choices. Consider placing the camera at a vantage point where it can cover a broad area or near entry points to capture anyone entering. Ensure the spot provides a clear, unobstructed view and is within reach of a power source, especially for wired cameras. Additionally, think about potential privacy concerns; avoid bedrooms or bathrooms to respect privacy. By thoughtfully choosing your camera’s location, you can enhance your home security and get the most out of your device.
Verifying Power, WiFi, and Storage Needs
Before installation, ensure your camera will have reliable access to power, whether through an electrical outlet for wired setups or a fully charged battery for wireless models. Next, check your WiFi signal strength in the camera’s intended location; a weak signal can lead to lag or disruptions in live feeds. Utilize WiFi extenders if necessary. Additionally, consider your camera’s storage options. Some devices offer cloud storage services, while others use local storage like SD cards. Evaluate which option best meets your needs for saving footage. Addressing these requirements beforehand ensures a smoother installation and long-term performance.
Quick Installation Steps
With preparations complete, you’re ready to install your camera.
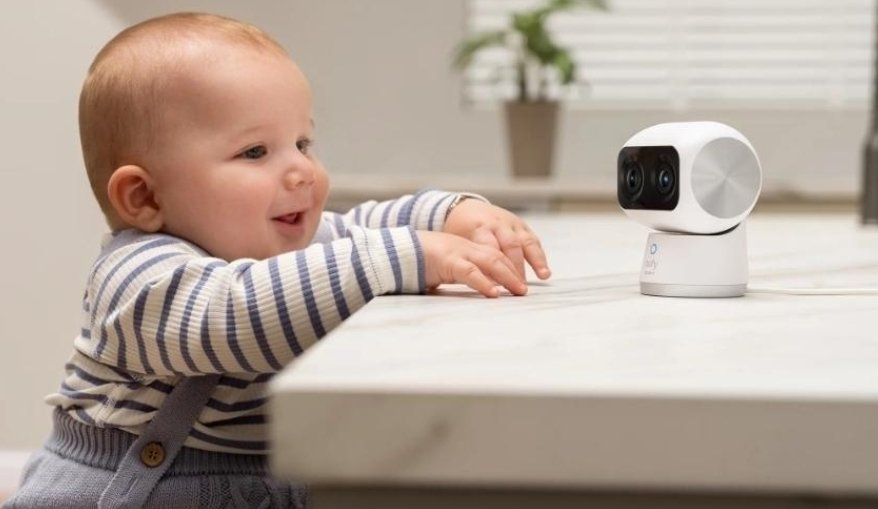
Unbox and Install Your Device — Using the eufy S350 As an Example
Begin by unboxing your eufy S350 and familiarizing yourself with the components. The package typically includes the camera, a power adapter, mounting hardware, and a user manual. Follow the manual to attach the mounting bracket to your chosen spot, using screws or adhesive as per your preference. Slide the camera into the bracket and adjust it to capture the desired view. Connect the camera to a power source, and if needed, insert a microSD card for local storage. The eufy S350’s intuitive design allows you to install it in just a few minutes, even if you’re a tech novice.
Configure the App and Test Live View & Alerts
Download the eufy Security app from your device’s app store, and create an account if you don’t have one. Follow in-app instructions to add your new camera by scanning the QR code on the device. Connect it to your WiFi network, ensuring a stable connection. Once configured, test the live view feature to verify its angle and coverage. Adjust the camera as needed. Set up alert notifications to receive alerts instantly when motion is detected. This easy app configuration process helps ensure you’re getting the maximum benefit from your indoor camera’s features.
Maintenance & Ongoing Checks
Ensuring your camera’s longevity involves regular upkeep.
Monthly Checks for Firmware, Alerts, and Storage
Perform monthly maintenance checks to keep your security camera system running smoothly and securely. Start by updating your camera’s firmware through the companion app—these updates often fix bugs, enhance performance, and strengthen protection against new security threats. Review your alert settings and adjust notification preferences to match your daily schedule, ensuring you’re informed without unnecessary alerts. Check available storage to confirm there’s enough space for continuous footage recording. If you rely on cloud storage, make sure your subscription remains active. Regular, proactive checks ensure your security system operates efficiently and remains fully reliable.
Clean Lens, Adjust Position
Cleaning your security camera lens regularly is essential to maintain sharp, high-quality footage. Aim to clean the lens at least once a month using a soft microfiber cloth to remove dirt, dust, and smudges that can blur the image. Avoid harsh chemicals, as they may damage the coating on the lens. While cleaning, take a moment to reassess the camera’s angle and position to ensure it still provides optimal coverage, especially if your home layout or lighting conditions have changed. Consistent maintenance keeps your camera performing efficiently and ensures clear, reliable surveillance year-round.
Handle Power or Connection Issues
If power or connection issues occur, take a step-by-step approach to troubleshooting. Start by inspecting all power cables for signs of wear, damage, or loose connections. If your camera operates on batteries, ensure they are fully charged or replace them if necessary. For WiFi-related problems, verify that your router is functioning properly and that the camera is positioned within a strong signal range. Rebooting the camera or router often resolves minor glitches quickly. Regularly maintaining connections and power sources helps prevent recurring issues, reduces downtime, and ensures continuous, dependable security coverage for your property.
Conclusion
Installing and maintaining an indoor camera need not be daunting. With the right preparation and straightforward steps, you can set up your camera quickly and ensure it continues to function smoothly over time. Regular maintenance checks, including updates, cleaning, and troubleshooting, will help you maximize your camera’s utility and longevity. By following this guide, you’ll possess reliable home security and gain peace of mind knowing your home is under vigilant watch.