The Best AI Video Enhancer in 2026: 10 Tools Compared (Upscale to HD/4K Fast)
Your phone clip looks perfectly fine until you upload it. Suddenly it’s blurry, noisy, and oddly soft, especially on larger screens. That frustrating quality drop is precisely why AI enhancement has gained significant popularity. This guide compares 10 AI video enhancers and shows you exactly how to achieve a clean HD or 4K result without any technical headaches.
If you want a fast, reliable solution right away, our top pick is 4DDiG Video Enhancer, thanks to its simple import > AI enhance > preview > export workflow and strong results even for older or low-quality clips.
| Tool | Best for | Platform | Key AI Features | Main Limitation |
| 4DDiG Video Enhancer | Beginners & all-in-one repair + enhance | Windows | Unblur, upscale, sharpen, restore | Desktop-only |
| Topaz Video AI | Maximum quality upscaling | Windows / Mac | Frame-by-frame AI, 1080p–4K | Expensive, GPU-heavy |
| AVCLabs Video Enhancer AI | Multi-mode enhancement | Windows / Mac | Denoise, deblur, 4K/8K | Resource-intensive |
| DaVinci Resolve | Editors & mixed footage | Windows / Mac | AI SuperScale 3×/4× | Steep learning curve |
| CyberLink PowerDirector | Editing + enhancement | Windows / Mac | AI video enhancement | Less specialized |
| TensorPix | Online 4K upscaling | Web | Cloud AI upscaling | Upload/credit limits |
| Remini | Quick social clips | Web / Mobile | AI reconstruction, 2× | Limited control |
| Canva Video Upscaler | Fast short-form content | Web | Preset enhancement styles | Not true restoration |
| Media.io AI Video Enhancer | One-click online results | Web | HD/4K upscaling, denoise | Queue & size limits |
| Video2X + Real-ESRGAN | Free/open source users | Windows/Linux | Model-based upscaling | Complex setup |
Best Overall: 4DDiG Video Enhancer (Why It’s #1)
4DDiG Video Enhancer brings many benefits, making it better than others, including the following:
- All-in-one enhancement: unblur footage, increase resolution, sharpen details, and restore older or damaged videos in one place.
- Beginner-friendly workflow: clearly positioned as “enhance in 3 steps,” with real-time previews before exporting.
- Bigger workflow advantage: bundled inside 4DDiG File Repair, allowing users to fix corrupted or unplayable videos and enhance quality without switching tools.
- Performance-focused: optimized processing makes enhancement faster than many multi-step or manual AI pipelines.
This is the best AI video enhancer for most people because it removes technical workload while delivering amazing improvements.
Who it’s for?
4DDiG Video Enhancer is ideal for casual creators, professionals working with older footage, and anyone who wants results without learning complex AI settings. If you care more about clarity and speed than tweaking dozens of parameters, this tool fits perfectly.
How to use?
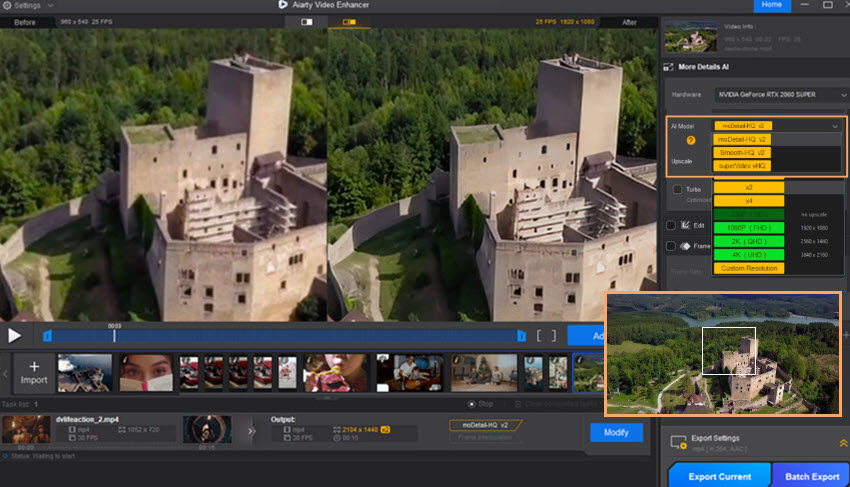
- Download and install 4DDiG File Repair software on your computer, then launch it. Select “AI Enhancer” from the left side and click the “Video Enhancer” option. Click “Add Videos” to import your video.
- Select the AI enhancement model along with your desired “Resolution” and “AI Enhance” method, then click “Enhance”.
- Preview and compare the results side-by-side, then export by clicking the “Save” button and choosing your desired location.
That’s it, no timeline setup, no manual model configuration.
The Other 9 Tools
Here is everything you need to know about the other 9 tools:
Topaz Video AI
Best for: Maximum-quality upscaling
What it’s good at: Frame-by-frame reconstruction to 1080p or 4K with detailed previews.
Main drawback: High price and heavy GPU requirements.
Ideal user: Professionals chasing the highest possible fidelity.
AVCLabs Video Enhancer AI
Best for: Multi-mode AI enhancement
What it’s good at: Denoise, deblur, and upscale to 4K or even 8K.
Main drawback: Resource-intensive on mid-range systems.
Ideal user: Power users with strong hardware.
DaVinci Resolve (AI SuperScale)
Best for: Editors working with mixed-source footage
What it’s good at: 3× and 4× AI SuperScale integrated into an editing pipeline.
Main drawback: Complex interface for non-editors.
Ideal user: Video editors already using Resolve.
CyberLink PowerDirector
Best for: Consumer-friendly editing + enhancement
What it’s good at: AI video enhancement built into a timeline editor.
Main drawback: Less specialized than dedicated upscalers.
Ideal user: YouTubers and casual editors.
TensorPix

Best for: Online 4K upscaling
What it’s good at: Cloud-based enhancement without installation.
Main drawback: Upload limits and credit-based usage.
Ideal user: Occasional enhancement for short clips.
Remini
Best for: Fast improvements to social videos
What it’s good at: AI reconstruction with easy 2× enhancement.
Main drawback: Limited professional control.
Ideal user: Mobile-first creators.
Canva Video Upscaler
Best for: Quick content polishing
What it’s good at: One-click enhancement styles inside Canva.
Main drawback: Not a true restoration or upscaling engine.
Ideal user: Social media teams and marketers.
Media.io AI Video Enhancer
Best for: Simple online enhancement
What it’s good at: Generate-style workflow with HD/4K outputs.
Main drawback: Queue times and size restrictions.
Ideal user: Users avoiding desktop installs.
Video2X + Real-ESRGAN
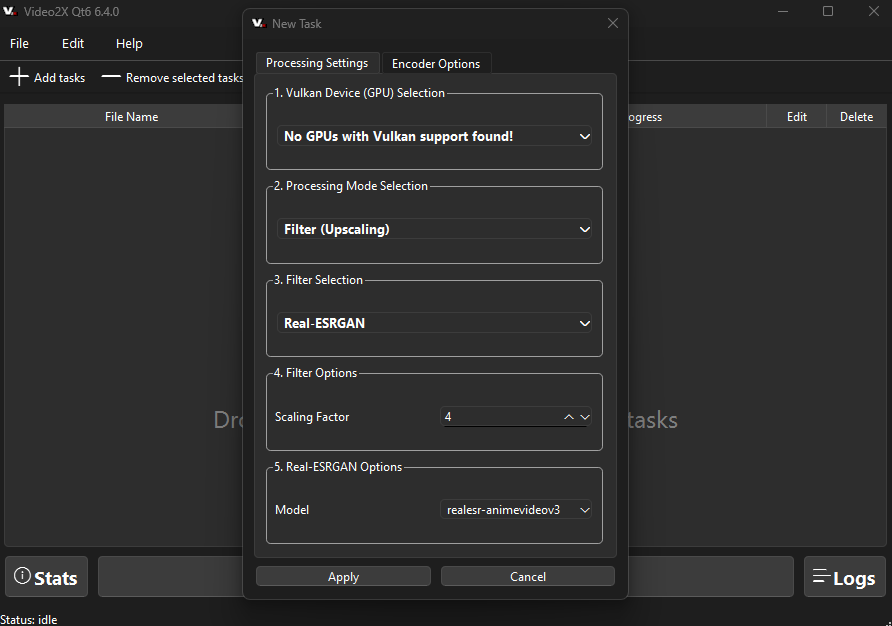
Best for: Free/open-source enthusiasts
What it’s good at: Model-based upscaling with no licensing cost.
Main drawback: Complex setup and GPU dependency.
Ideal user: Technical users comfortable with configuration.
How to Choose the Right AI Video Enhancer
If you want the highest possible quality and have a powerful GPU, a dedicated desktop upscaler like Topaz or AVCLabs makes sense.
If you want quick results with minimal setup, choose a guided workflow with preview and export. This is where 4DDiG stands out.
If you need no installation, an online enhancer works, but expect upload limits and privacy trade-offs.
If you want free and open source, be prepared for setup time and inconsistent results across clips.
This is where understanding your priorities matters more than raw specs, especially when choosing an AI video enhancer for everyday use.
Best Practices (Make Results Look Real, Not “AI”)
When using AI video enhancers, follow the tips below for natural results:
- Reduce over-sharpening to avoid halos around edges
- Apply video denoise AI gently; too much creates waxy textures
- Export bitrate matters; a low bitrate can destroy gains
- Avoid multiple re-uploads with online tools to prevent compression stacking
- Use the Deblur video AI selectively, especially on faces and text
FAQ
Can an AI video enhancer really upscale to 4K?
Yes, many modern tools are positioned to upscale video to 4K, though results depend on source quality and the AI model used.
How long does AI enhancement take?
Processing time depends on clip length, target resolution, and hardware. Short HD clips may take minutes, while long 4K projects can take hours.
What’s the best order: denoise, deblur, upscale?
Generally: denoise first, then deblur, and upscale last. This prevents amplified noise during resolution increases.
Is it better to use online or desktop tools?
Desktop tools offer better stability, privacy, and batch processing. Online tools trade power for convenience.
What’s the easiest AI video enhancer for beginners?
For most users, 4DDiG Video Enhancer is the easiest AI video enhancer thanks to its guided workflow, preview system, and all-in-one design.
Conclusion
Blurry uploads, noisy footage, and outdated videos no longer need to stay that way. With the right AI video enhancer, you can restore clarity, upscale to 4K, and enhance video quality without technical frustration. While many options exist, 4DDiG Video Enhancer offers the best balance of simplicity, speed, and results for most users.